
I’ve been doing lots of crafting lately; making the best of the cold and rainy weather, and crossing things off of my huuuuuuuge ‘to make’ list at the same time. Ben has become obsessed (and I mean absolutely, talk-non stop about it, eat-sleep-and-dream-about-it obsessed) with Lego, so it’s nice that we can sit together in the quiet and work on our projects – sometimes he has a little hum, or talks to himself, which makes me want to eat him a bit.
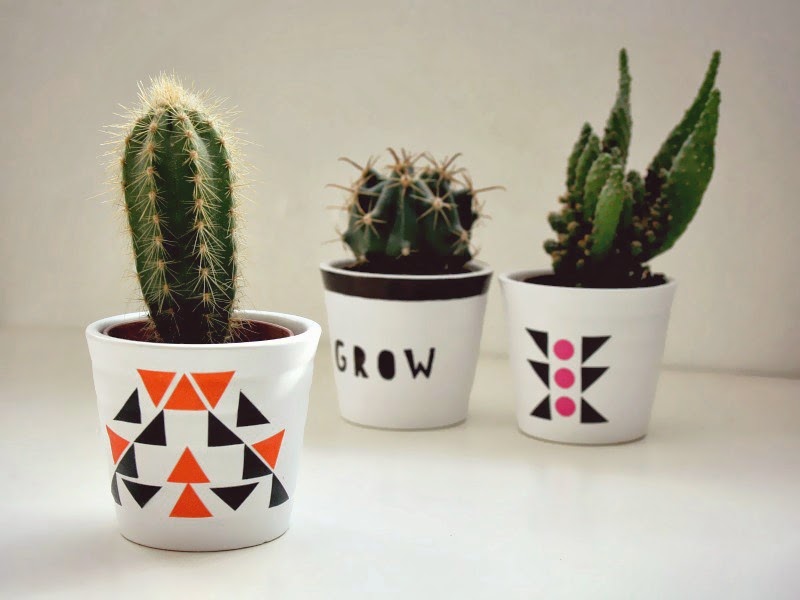
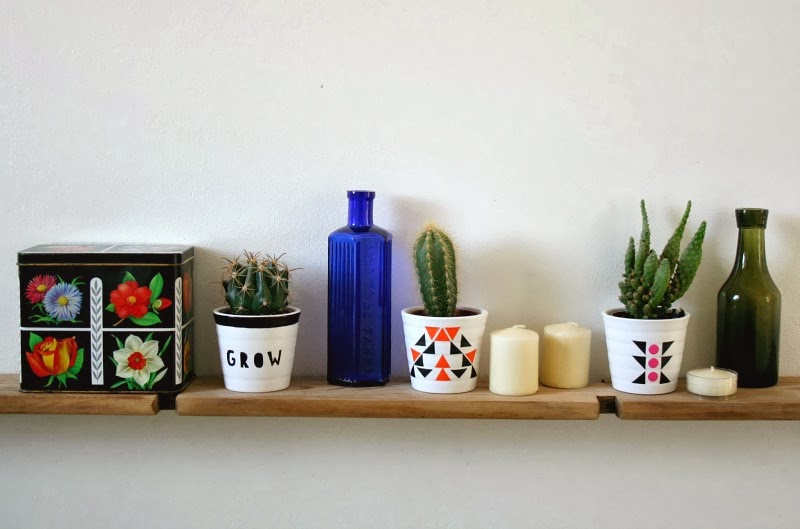
One thing I’ve been meaning to do for absolutely ages, was makeover some small IKEA plant pots that stood on our little shelf in the bathroom. They’re home to various little cacti, and as with anything plain white, I had an urge to stick things on them (this also applies to walls, furniture, clothing, and so on…), so got a bit happy with some washi tape, coloured sticky dots and a sharpie.

Geometric Washi Pots
These are so easy to do, and ridiculously addictive as well – once you’ve decided on your colours and design, you’re looking at a fifteen minute job, max. The thing to remember is that if your plant pot tapers towards the bottom (like mine did), you won’t be able to stick any tape in a band around it as you would a glass jar or straight-sided pot. But never mind – because you can do wonderful things with triangles instead!
1. Make sure your pot is clean and dry – it’s really important to do this, otherwise your tape will start to peel off once you’ve stuck it on, and you’ll end up prodding at it neurotically.
2. Choose your colours and tape – mine were from Tiger (if you’ve never been to a Tiger, then you must go now. Now. Run!), but you can find similar here, here and here.
3. Cut out the shapes printed on the tape, and begin to arrange in a design you like. You could plan it all out first, I suppose, but I just winged it and plonked them where I thought they looked best. Continue to stick your shapes on, until you’ve covered your pot (hands, face….) and you’re happy with how it looks.
4. Either using mod-podge or a mix of PVA glue and water, coat your pot so it has a nice hard finish – this keeps the pesky shapes in place and prevents peeling. Leave to dry, place your plants inside and admire.
Text-Decorated Pot
As with quite a lot of my crafty ideas, the actual finished model looked nothing like the image in my head; I had visions of fancy letterpress style text on the side of my pot, but it turned out that it was too small – also, you can’t really see in the photos, but the sides are sort of ridged, so it made this a whole lot more of a ballache than it should have been. But, you live and learn. Or something.
1. Decide what you want to write – I went with a simple ‘grow’, because I thought it might encourage my plants to not, you know, die and stuff. You could write anything really, as long as it fits on the side – I’m going to do a bigger pot with ‘water me’ on the side as well.
2. Open word, or choose a font from a book (you can find great books with typefaces in the library), then write or trace your message and print out. Turn over, trace over the reverse of the letters, then place right-side-up onto the side of the plant pot, and scribble over the top of the text. You should end up with a faint copy of your chosen words on the pot – hurrah!
3. Using a fine Sharpie or permanent marker, ink over the top of your tracing carefully. You might find you need to do it a couple of times to get a nice even finish (I think I did it three times altogether), but it’s worth taking the time over.
4. Add any other decoration, then leave the ink to dry thoroughly, or you’ll be in smudge-hell.
5. Place your plant inside, and then reward yourself with biscuits.


I love these! I'm in need of some new plant pots so this would be perfect 🙂
loving the orange and black ones! simple diys like this are awesome.
Such a good, simple idea! And the colours of those sharpies are amazing!
these are brilliant LOVE LOVE the patterns! xx
these are brilliant – my favourite is the text one. what a great idea for a quick project, i need to get myself some washi tape!
LOVE the look of these. So clever!
That looks really effective and I have some tape leftover from Christmas.
These are brilliant and my daughter has reels of washi tape … Jo x
Love these! I have lots of washi tape, I love it x